

Rigby loves many things: yams, tug-of-war, her squeaky donut. But most of all, she loves warmth. If there is a fuzzy blanket, patch of sun, or little-spoon position available, she’s there.
So when I came across the pattern for Italian Greyhound pajamas by Halat Sophie, I knew she had to have a whippet-sized version of her own.

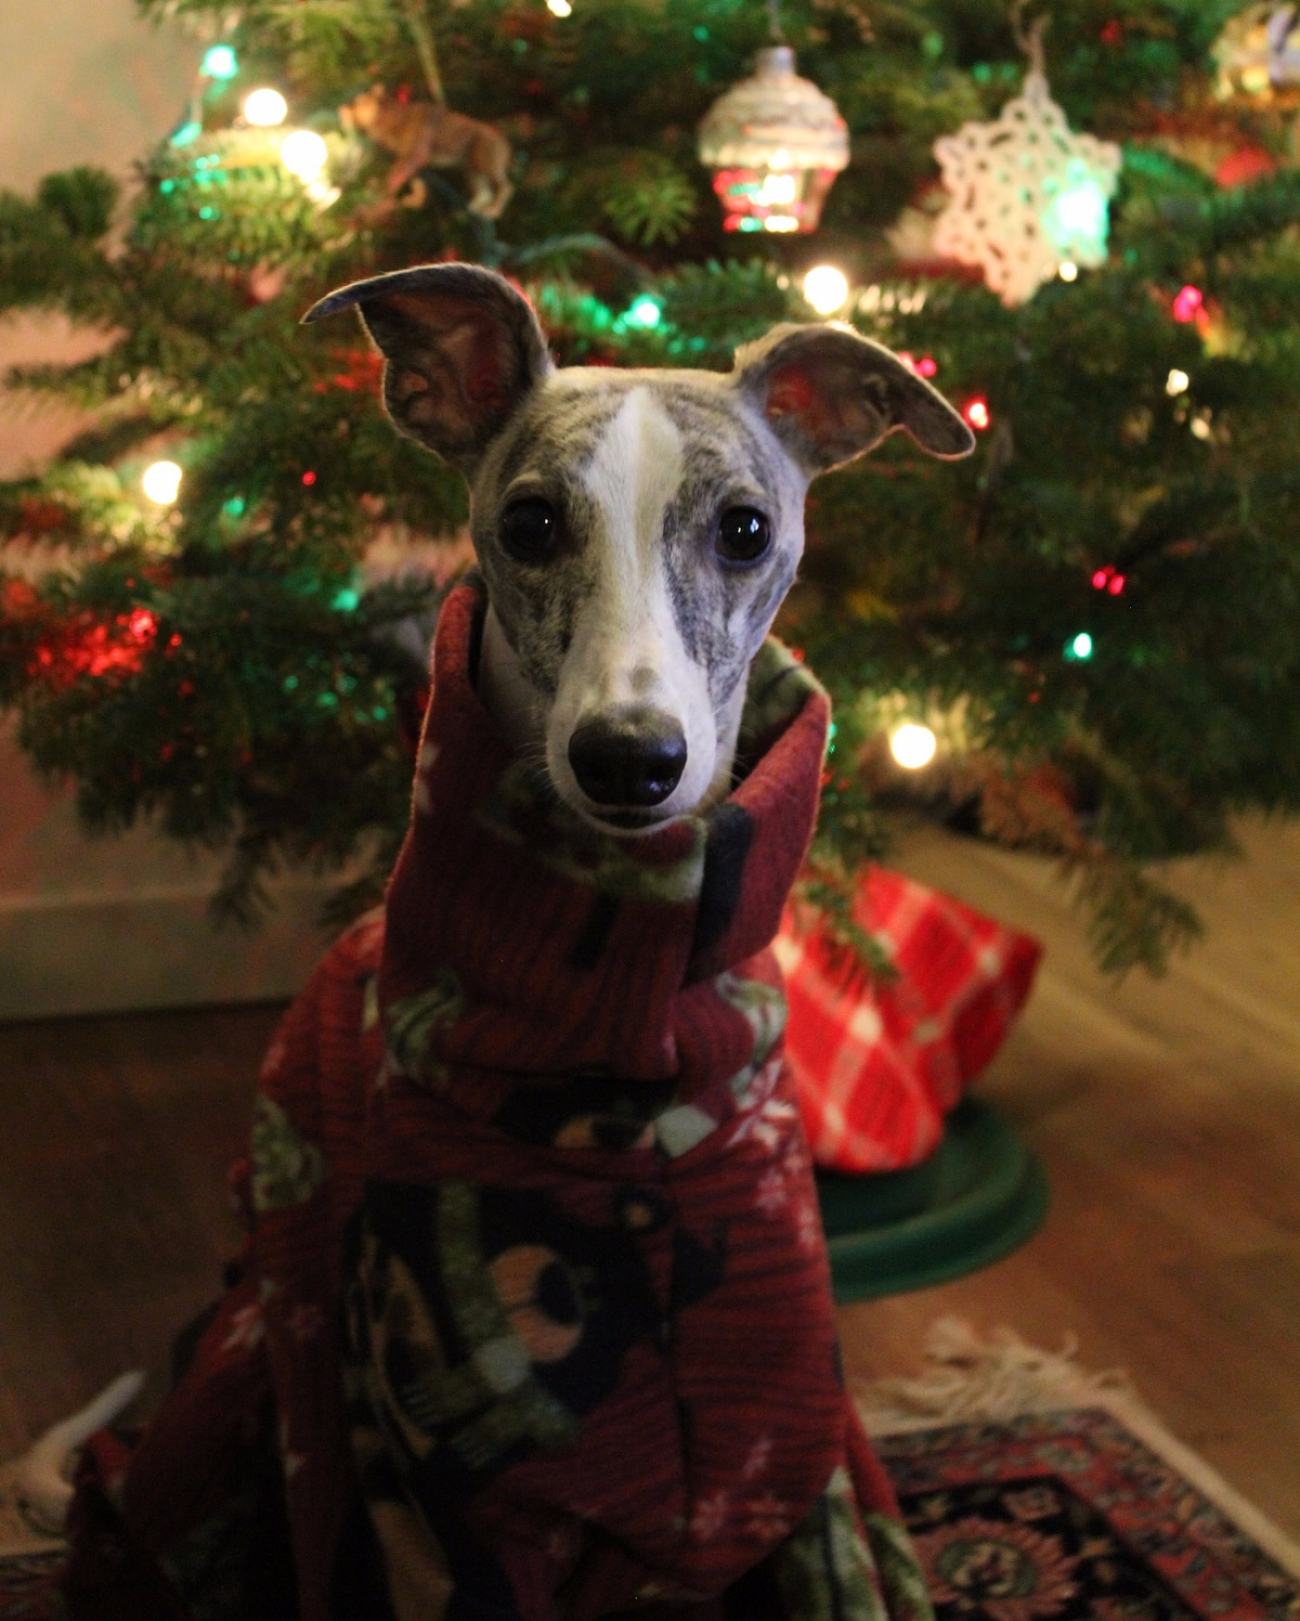
Rigby has her fair share of sweaters, but this one is by far her favorite. Unlike the others, it covers her back legs, too, and is loose and soft enough to feel like she’s perpetually under her favorite blanket. A canine snuggie!

It’s also a great base for Halloween costumes. We’ve used a scale-patterned fabric to make the dilophosaurus from Jurassic Park, and added white cutouts for a skeleton (pattern for the bone appliques is here!).


Pattern
Download the printable PDF pattern here! Be sure to adjust your printing settings to 100%. The pages have built-in margins for overlap, so all you need to do is line them up using the circles at each intersection as a guide.
Here’s what the pattern will look like when assembled:

Tips:
- Scaling up/down: The pattern fits Rigby, who is a fairly petite whippet (21″ from base of neck to tail). If you need to scale up or down, I recommend using that measurement as a guide — it matches the length of the fold line on the main body piece of the pattern. You can either scale it up on your computer, or if you’re like me and don’t have a printer, cast it to the TV and trace!
- Fabric: I picked up this fleece print at Joanne’s for $6. A single yard was just enough, so if your whippet is bigger than Rigby, I’d recommend about a yard and a half for some wiggle room. You can use any stretch fabric for these, but I prefer fleece since it’s comfy, crooked stitches are hidden in the fuzz, and it won’t fray. Using a new needle and longer stitch length will help you avoid skipped stitches.
- Note on sleeve cuffs and neck piece: These can be as long or as short as you want, or even nonexistent! I prefer to add a fairly long, snug snood for the neck, and simple fleece cuffs. You can also use stretchy knit ribbing for the sleeve cuffs — if you go that route, cut the piece a bit shorter and stretch it as you sew for a cute cinched look that will do a better job keeping the cold out.
Sewing Instructions
White indicates the “right” side of the fabric, or the side you want to show. Stripes represent the “wrong” side of the fabric. On fleece, that is usually the side that is fuzzier. If it has a pattern, it will be less defined on the wrong side, as well.
 Step 1: Take the main body piece and lay out, with wrong side up. Fold up about 1/2″ of fabric at the indicated placements and stitch down. This will give a nice finish to the edges around the tummy and tail openings.

Step 2: Take all four cuff pieces and the neck piece, and fold each in half with wrong sides together (right sides showing). Attach as indicated to the main body piece (back leg cuffs), the arm pieces (front leg cuffs), and the neck opening. For each of these, you’ll be sewing through 3 layers of fabric.
Be sure to pin and/or baste stitch the neck pieces together before sewing to ensure no bumps.
If you don’t want cuffs and/or a neck snood, you can skip this step and simply fold these edges over like in step 1.

Step 3: Form the legs by sewing the colored lines to each other (purple to purple, pink to pink, etc.), with right sides together. The front arms can be a bit tricky, so be sure to pin carefully and/or baste stitch first.

Step 4: Turn the back legs right-side-out to check your work — it’s coming together!

Step 5: Fold the whole thing in half along the back (right sides together), and sew along the pink lines only. You can do a test fit on your dog at this point in case you want the neck snood to be tighter.

Step 6: With the onesie inside-out, bring together the sides of the sleeves (right sides facing each other) and the chest, lining up the center line of stitching between the neck and chest pieces. Turn right-side-out and your whippet pajamas are complete!
Add Leash Opening
As a bonus feature, you can also add a leash slot! Rigby wears a harness, but you can put the same slot higher up on the neck if you use a martingale instead.
On past coats, I’ve sewn a standard buttonhole for the leash, but I was never very happy with how they looked. For this project, I discovered the magic of the bound buttonhole:

I think it looks more polished, and the fabric folds “close” the hole so the cold can’t get in.
I had to look up a couple of tutorials to get this right, but the clearest was this one from Craftsy.

Do you have a favorite dog coat pattern, or have you made your own puppy pajamas? Share in the comments below!

Aww your dog is so adorable, she’s really good at posing for the pictures as well !
LikeLike
The link to the pattern has expired… ☹️ Any chance you have a copy of the pattern you used?
LikeLiked by 1 person
Oh shoot! You know, I just have a physical cutout, so I guess this is an excuse to make my own write-up on how to make them. May take a few weeks though, sorry to say!
LikeLike
This prints out to not the right size at all and there are way too many pieces included. The pdf doesn’t match the picture you posted
LikeLike
Hi again! I’ve updated the post with a PDF pattern and instructions! 🙂
LikeLike
Hi from Australia! I can’t seem to find the pdf
LikeLike
Hello! Here ya go: https://thepointysnoot.files.wordpress.com/2017/11/whippet-onesie-pattern.pdf
LikeLike
Thanks so much for this awesome pattern! My baby has a new romper thanks to this pattern and excellent instructions. I’ve shared your blog to my sewing group.
LikeLike
That makes me so happy to hear! I’d love to see a photo!
LikeLike
I wanted this pattern for my Poodle Bichon mix (had surgery)…he is very flexible like a cat and can reach beyond his cone to nibble at his wounds. I printed the pattern out at 100% with 2 pieces of the pattern per page to shrink it down to his medium size. Thank you so much.
LikeLike
Hi, should there be 4cuffs (part 4)? Thanks!
LikeLike
Oops, yes! 4 cuff pieces total.
LikeLike
Thanks so much for the reply. My first whippet, my first sewing attempt!
LikeLike
The pattern was perfect, great instructions – came out great! How can I send you a picture? Hope you can see the pix on Facebook.
https://www.facebook.com/luca.bransche
LikeLike
Thanks heaps great pattern, my whippet loves it
LikeLike
Any chance there’s an A3 size printable PDF?
LikeLike
There isn’t, but if you print at 100% on the A3 paper you should be able to just trim the extra margin and assemble as though they were 8.5×11”.
LikeLike
Has anyone made this for a larger dog and can give a tip for how much larger to make the printing for a dog measuring 32″ down the back?? didn’t want to trial and error printing … printing 16 pages at a time several times over could get wasteful! lol. maybe a tip for what percentage to “up” the pattern?? THanks soo much! we’ve just moved to Canada and i got a pooch (rescued from Spain) who keeps jumping up on my bed in the middle of the night b/c i think she’s getting cold!
LikeLike
I would try 150-160%! Is she a Galgo? 😍
LikeLike
Honestly we have no idea what she is. She and her siblings were found in a garbage bag in Spain. I adopted her from a rescue organization and they said she was a pointer mix… my guess is with spanish greyhound! 🙂 . Shes thicker than a typical greyhound, but runs like one! and has the very long legs and lean face. She’s black and white with a dipped tail 🙂 people are ALWAYS coming up to us and asking us about her! she attracts a lot of attention.. which is funny b/c she’s typically not a fan of strangers! i’ll try the sizing and let you know how it goes… would there be a way to send you a picture if it all works out?
LikeLike
@Crystal Humble – Is she possibly a Podengo? We’re just outside of Toronto, and we rescued one some years back from a shelter, and later learned about the Podengo rescue organizations in Portugal and Spain – to our best guess, that’s where she came from. Sadly, Podengos are often abandoned at the end of the hunting season. She’s doing well at 35 lb, so a little larger than a whippet but smaller than a Galgo. (When we adopted her, she was only 23 lb, so very much underweight.) Her first winter with us, we noted she was shivering once the temperature dipped below 10C, so I knit her a sweater and she was excited to wear it because it meant she could stay out for longer. She’s older now (almost 12) and starting to feel the cold even indoors; following surgery last spring, we noted she likes having PJ’s on in the house to keep her cozy.
@thepointysnoot – thanks SO much for the instructions – I’ve been looking for something that I can do on my own, since many purchased items and/or patterns leave her tummy more exposed than she’d like.
LikeLike
So i don’t think she’s a full one.. maybe some kind of mix with that breed. She was found as a puppy with 2 siblings i think. she’s super tall, black and white, and around 70 lbs! everyone stops us when we’re out asking what kind of dog she is… maybe i need to do a dog DNA test on her! so i know what to say other than a Spanish street dog! 😉
i’m in the North York area! She’s loves this snow.. but not sure about the cold! lol
LikeLike
Great pattern. Thanks for sharing.
I love the bound button hole for the leash. They are so much nicer and wear better than other options. I’ve also seen a small flap added to help keep the cold out. when not in use.
@Crystal Humble. Are you sure your dog is 32″? That is a VERY long dog. The 21″ referenced is from neck to base of tail. If it is correct, you are looking to add 11″ to the length. You may also need to a adjust waist girth, leg length and neck hole. The good news is that once you get the pattern adjusted, it will be easy to create coats and other warm clothes for your fur baby. I have a dog from Argentina and also live in Canada, so appreciate your needs.
Adjusting the pattern:
================
Start by printing the pattern as-is and assemble all the small pages into one piece.
Since the pattern appears to be symmetrical, it is easier if you fold the pattern in half along the back (spine.) Cut the pattern along the fold and use only half for your alterations. When you eventually cut your fabric with the adjusted pattern, place the spine edge on the fold of the fabric to get the symmetrical piece you need.
Take accurate measurements of your dog.
To extend length:
=============
Locate the section of the waist where there are no legs attached. This is where you will make a straight cut across the waist. Spread the pieces apart by the length you need to add. Add paper to cover the gap, ensuring that the cut pieces are parallel, the spine is straight and the extension is the correct length before taping it together. With a pencil, sketch a smooth curve on the new paper extending the lines from the original parts.
To shorten length:
==============
Cut the pattern in the same location as for lengthening. Then overlap the cut pieces by the amount you need to shorten. Do not overlap so much that you interfere with the leg openings. Re-draw a smooth curve to join the original parts.
To adjust leg girth:
==============
Rear legs – add or subtract girth in the leg seam.
Front legs – the simplest way to adjust is to leave the leg holes and upper leg width as is and taper the lower part of the leg along the seam line. Since this is a loose-fitting pattern, this should be OK for most adjustments. If not, you will need to increase/decrease the circular parts of the leg holes and leg pattern piece.
To adjust leg length:
===============
Add or remove length to the bottom of the legs (or cuffs if using.)
To adjust neck size:
===============
Add or subtract girth in the straight seam under the chin on the neck band and body piece.
Add or subtract length on the neck band. If using a doubled piece for neck band, remember to double the additional length.
Once you get the pattern adjusted and tested for your dog, take the time to copy it onto a large piece of paper (large compost paper bag, wrapping paper, drawing paper) or sew-in interfacing for future reference. If you cut the pattern along the spine, remember to mark the spine as a FOLD line or duplicate along the spine to create a one-piece pattern that can be cut as is.
Hope this helps. If you need more info, search for “pattern adjustment” or “pattern alteration” as the principles that apply to human patterns also apply to canine patterns.
LikeLike
thank you i’ll try that!
LikeLike
I just discovered your site and this pattern! Lovely!!! Thanks!!!
LikeLike
MASSIVE thanks for the pattern and your step-by-step explanation, it’s so good I’ve already hand-stitched two onesies for my whippet in a span of a week!:) I was looking for something to keep him cosy enough so that he doesn’t go into my bed all the time at night and I have to say, the onesie has truly delivered. 🙂 No more cold snoot right in my face at 3am, and then 5am, and then 6am again… I’d post a pic but there’s no such option here. You have to take my word for it that he’s looking very dapper in his fluffy grey and navy fleece onesies.:)
P.S. Greetings from Poland:)
LikeLike
You are a kind soul for generously taking the time to prepare and share this pattern and tutorial. After I adjusted for size, it is exactly what I needed for my Greyhound mix who freezes in our Canadian winters. I am very happy with how it came together. Now I need to customize the pattern for his Cocker Spaniel/King Cavalier friend who always shivers…
My modifications:
Closer fitting for outdoor use rather than lounging works great with this pattern as well in case anyone is wondering.
Fold 2″ strips of super stretchy swimsuit fabric (cut for most stretch along the length) over all the raw edges and in place of the cuffs. An option is to use commercial Lycra binding. This is how some human fleece clothing is finished. Stretch it a bit and pin before you sew, so there is a bit of tightening at the cuffs. I cut mine about 25% shorter than the cuff width, but it will depend on the stretch of your strips and how tight you want them to be.
Instead of hemming the three parts of the tummy opening in step 1, wait until after the arms are attached and the leg and arm seams are sewn. This gives a nice clean finish as it is in one continuous loop, the seams are less bulky and there is no need to perfectly align previously hemmed edges.
Also a reminder to beginning sewers that a stretch or zig-zag stitch should be used when sewing stretchy fabric so the threads don’t break when the fabric stretches.
LikeLike
thank you fro sharing, it looks great!!!
LikeLike
Thanks so much for posting this, it’s starting to get cold here in the mountains of California and I took your advice to upsize this on my TV for my greyhound. I’m fairly new to sewing, and I’m running into an issue where the length of the curvy part on the front leg is no longer the same total length as it’s counterpart on the main body in step 3. Another way to say this is the leg purple line is shorter than the main body purple line (same with pink to pink).
Do you face any suggestions for how to get them to match?
Thanks!!
LikeLike
I have this same issue when I downsized (on computer and the print out circles to line up are all in order). Therefor too much fabric of the body and thus a frumled foreleg jointment. No clue how to adjust only the front legs.
LikeLike
Just made my very elderly whippet Rudy ( he’s nearly 15 yo) a very cute set of PJs. Thank you so much for the pattern he loves them. Now got to make more for the other whippys in our family. Very much appreciated xx
LikeLike
Hi There! What is the Girth of Your Whippet? Thanks so much for sharing this pattern!
LikeLike
For sure! She’s about 19-20” around the chest.
LikeLike
Love this! I’ve been making my greyhound snooded jackets for years and have always wanted to make her a pair of pajamas, but was so intimidated by the sleeves. I made a few adjustments to turn the whippet pattern into something large enough for my female grey and took off the back legs (my girl is a tripawd). Still working out the final adjustments for a perfect fit, but the first version is so cute and I’m so proud to have tackled sleeves! So excited to see it all come together for the final, perfectly fitted version! Our matching family Christmas pajamas this year are going to be top notch!
LikeLike
Hi there!
Many thanks for your very detailed pattern and the margin help!
So I spent… About 4 hours yesterday evening to resize the pattern for my saluki cross (she’s 28.75 inches on the back, so basically I needed the pattern to be 133% of the size of yours. After several attempts attempts and a printer exorcism I tried to resize everything 133% to see if it works. I ended up with each of your page on four pages so it’s been a looong folding and taping session hahaha but I’m there!
Next step, cut the fabric. I would like to add a zip on the back piece instead of the folding line. Do you think I can do that by “simply” cut the back and attach it again with the zip?
Thanks a lot!
LikeLike
I don’t see why not!
LikeLike
And so I did and… It actually helps a loooot because I don’t need to deal with the full body piecs each time, just half of it!
Thanks a lot again. Thanks to you I made my first sawing project with a sawing machine and Hera likes it!
LikeLike
Love it!! I may have to try this for myself!
LikeLike
Hi! Thanks so much for posting this pattern! I was wondering if there is a standard 5/8″ seam allowance built-in to this pattern?
LikeLike
Yep, that’s correct!
LikeLike
Am i the only one who cannot figure out how to put all the pieces of this pattern together? i am a fairly experienced sewer, but after printing out all these pieces, i can’t figure out the entire lower section of the body1 Help!
LikeLike
Is there a specific part you’re having trouble with? The main/biggest piece includes the whole body and the back leg sleeves, as well, in case that helps. The front leg sleeves are separate pieces.
LikeLike
Hi all!
Thankyou so much for this pattern it is my first time making anything and it’s been so good to follow!
I have printed it out and stuck together ready to cut out and stitch.
My only thing is I would like 2 legs not 4 for my pups!
Do I just cut from the back of the fold down to the middle of the stomach gap?
Hope this makes sense!
Also very grateful my pooches are same size as yours
Lauren
LikeLike
Yes, that’s exactly what you do! You can cut that on a curve and it should work nicely. If you have a sighthound, it may also help to add a simple curved dart right at the butt, to help it sit right without flopping around.
LikeLike
Hello,
Thank you so much for this. I printed the pattern and then used it a week later cometely forgetting that you had listed helpful tips and so made it up as I went along, in a different order to yours but it has worked as a compete novice. I am now trying to make them smaller for a much smaller whippet puppy but I am struggling to understand how. Any further light you can shed on this please?
LikeLike
I would like to learn how to make this pattern from scratch. How can I learn it. Is any book that I could buy that will give me the instructions? I appreciate if you give some information how to learn to create this pattern from scratch. Thanks.
LikeLike
Hi there! I would look up “pattern drafting” to learn more about how to design patterns from scratch. Or, if your dog has an old coat that fits, you can deconstruct it and create a pattern from that.
LikeLike
thanks a lot for the information.
LikeLike
You can send me a email about how to learn from scratch this pattern. Thanks again.
LikeLike
Hi! What a lovely pattern, I’m so exciting to try it!
I was wondering if you have an option without the back legs?
LikeLike
I don’t, but you could try altering this pattern by just cutting from the back of the fold down to the middle of the stomach gap, and possibly adding a dart on the back flap so it contours around the butt!
LikeLike
Brilliant pattern. I’ve made this today for my 14 year old Bedlington Terrier, Albie. I sewed it in a cheap fabric first and fitted to my model as he’s super skinny, and made adjustments to then cut out the nicer stuff. Looks fantastic in a cuddly soft fleece. It won’t let me put a pic on, but it looks great!
Thanks x
LikeLike
I am looking at the arm pieces and wonder if there is a notation that can be made on the pattern to show which direction or side the arm pieces get attached? I see it is not a symmetrical piece and don’t want to attach incorrectly.
Thanks!
LikeLike
In the image that shows the arm pieces attaching to the body piece it’s there, but subtle! The side with the slightly longer leveled-out part faces toward the neck.
Full disclosure, I’ve definitely put them on backwards before, and it doesn’t make too noticeable of a difference 🙂
LikeLike
Hi,
I live with two not-so-pointy snoots, one lab-bulldog-boxer rescue and a dobie-X also a rescue. Both girls were adopted as seniors. I was very happy to find your pattern, which was so neatly and clearly presented and explained, it was really easy to adjust to make my girls their own comfy pajamas. They love it, I must say, and I can see how their old joints enjoy the comfort and warmth. Thanks for sharing!
LikeLike
Thank you very much for this pattern, it is great. I used it to make winter coats for my iggies, I only had to figure by myself how to make a hood and I placed a zipper along the spine line, but for the rest it is entirely your pattern which you so generously offered for free.
I am very pleased with the coats (and so were my dogs, they were perfectly protected from snow). I would attach pics of the coats but I can’t find an option for attachments. Many many thanks for sharing!
LikeLike
Did you adjust the size for your Iggy?
LikeLike
Question>
I used this pattern last year to make my new Whippet puppy her first onesie for the winter. Now she is full grown and for this winter I would like to stitch multiple.
Last year I hand stitched her one, and since I am making more than one this year I would prefer to try my hand at using a sewing machine – but I have never used one before! Any tips on which stitch I should use, or tricks on sewing this with a sewing machine??
Thank you to anyone in advance!
LikeLike
Awesome! I just use a basic straight stitch throughout, but if you want extra stretch you could use a zig zag. Fleece is kind of thick so I set the stitch length a little longer, 3 or 3.5mm, so it doesn’t get stuck.
Some other tools I’ve picked up over the years are a walking foot (highly recommend) and a little plastic thing called a “bulky seam aid” that really helps when there are 3+ layers of fleece. Good luck!!
LikeLike
My whippet is about 12kg, do you think fits?
LikeLike
Yep!
LikeLike
Thank you.
LikeLike
Thank you so much! I made my whippet puppy, Summer, her first onsie and she loves it. Really appreciate you sharing this!!
LikeLike
The arm pieces don’t fit the opening like in the diagram the hole for the arms is smaller than the arm piece itself? How do the arm pieces get attached please?
LikeLike
Usually when inserting sleeves you have to “massage” the fabric a bit to get it to fit. A hack is to do a basting stitch all around and then pull the threads slightly to gather the fabric until it fits, then sew!
LikeLike
The problem I’ve got is after printing the template there’s not enough fabric on the arm piece? It’s too short. Please help lol sat here with all pieces laid across the floor 🙂
LikeLike
Okay I just pinned it and now the main body arm slot is all ruffled against the arm I’m attaching, is this normal? I have an industrial sewing machine I don’t know how to baste stitch haha
LikeLike
Hm I’m not totally sure, I will say make sure you’re *just* attaching along the colored lines from the diagram. So the whole sleeve edge, even the parts where the curve flattens out, is attaching only to the curved part of the body piece.
LikeLike
I’m wondering if it’s because my material is not stretchy at all ? It’s almost as if the arm cuff needs to be stretched to fit.
LikeLike
That could be it, this pattern works best with a stretchy fabric like fleece
LikeLike
I’m having trouble assembling the pattern pieces together.. I’m new to printing out patterns at home because I normally buy them.. Any suggestions?
LikeLike
I’m having trouble piecing this pattern together.. Normally I buy patterns but this looks cute and fun and I want to make one for my pitbull.. Any tips on maybe something I’m overlooking? I’m confused at the moment lol
LikeLike
Thank you so much for this. Just printed this out for my toy poodle! Can’t wait to make it. She is 15” from her neck to base of tail. Printed at 70% gave me 15” on the back straight line! I ended up printing it at 72% which came to about 15.5” on that back line!
LikeLike
Hey! Thank you so much for this pattern, it’s lovely, I have cut everything and it’s ready to sew tomorrow! My whippet is going to love it!
Do you have any tips on how to do a jumper with the front legs only? Thank you xx
LikeLike
Sure, should be simple enough to simply round off the end! A single dart up the back can help it curve over the backside.
LikeLike
Hey! I’m having trouble assembling the front legs, it looks like they don’t belong to the rest of the on the onesie. Any tips on how to sew them together?
Thanks!!
LikeLike
It’s a little counterintuitive as you’re sewing on a curve — basting first can help!
LikeLike
Hello – thanks for the great pattern. Any chance you’ve got an A0 or projector version of this pattern where all the pieces are on the same page?
LikeLike
Sorry, I don’t!
LikeLike
Mine is coming together for me not printing out a pattern, using it for a German shepherd, and not measuring twice before cutting. Thanks so much. My dog isn’t cold but because of an allergy that we have yet to pinpoint or eliminate he has to be in clothes at all times to prevent him from scratching himself raw.
LikeLike
Wonderful! I was looking at Etsy and didn’t want to pay $10 for a pattern if I didn’t have to. Been wanting to make my chilly little girl some longer jammies but I couldn’t just “figure it out.” I have a nice grey color blocked sweater dress that I saved just for her outfit. Thanks so much for helping our skinny dogs to stay warm!
LikeLike
So I searched the internet high and low for a recovery suit for my Shepsky. They wanted to much on selling websites for a 1 use suit. So I went on a search for something similar. Most patterns are for very small dogs but then I came across your website and pattern and you truly saved the day. While my girl has mostly left her incision site alone she still has been curious about it and nosed it, so in the suit she goes and at 6 months it is actually slightly large on her. I did modify to add a flap to cover the belly opening since that is where her incision is. Bonus she will likely get a few more wears out of it before it is too small. So thank you for offering this pattern and instructions for free.
LikeLike
I’ve just made these for our chilly whippet Spud, he loves them! No idea how to add a photo though!🙈
LikeLike
Thanks for this, just made my little girl one….
/Users/andy/Pictures/Photos Library.photoslibrary/resources/derivatives/B/BD568AC8-55BB-4989-A3DA-D81C985D46DB_1_105_c.jpeg
LikeLike
Thank you so much for sharing the pattern and easy tutorial. Can’t seem to find anywhere but here. Me and my mini pin can finally have cozy and warm winter.
LikeLike